UIViewController 는 UIKit 앱의 뷰 계층을 관리하는 개체이다.
한 개의 페이지는 반드시 한 개의 UIViewController 를 가진다.
ViewController Lifecycle
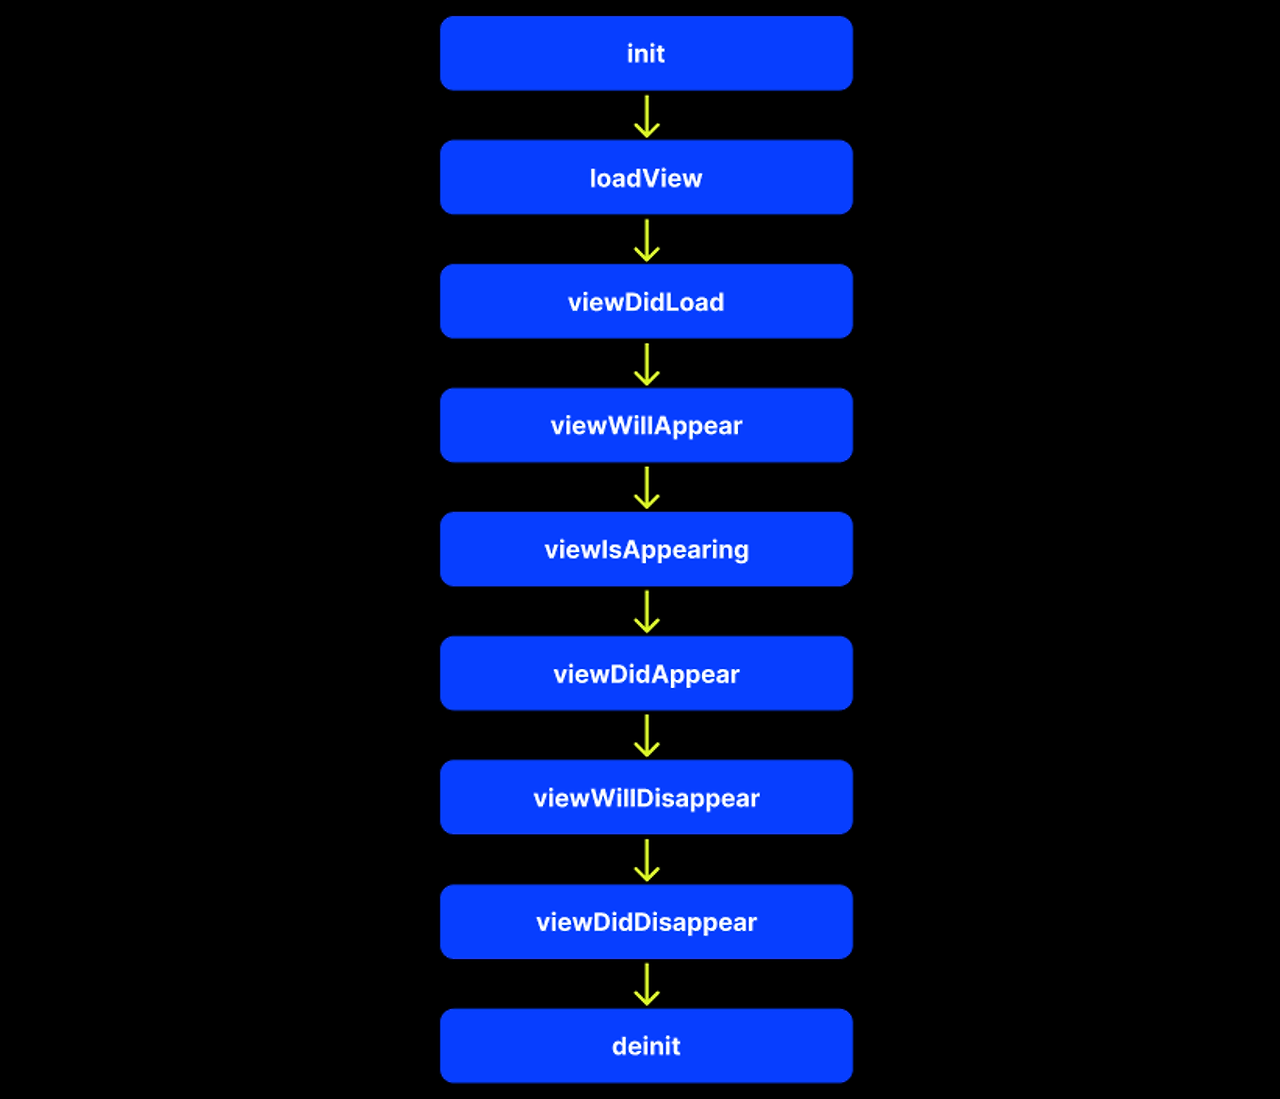
loadView 단계 - UIViewController를 만들게 되면 반드시 가지게되는 하나의 View
viewDidLoad - view 가 메모리에 load가 되었다. viewcontroller의 뷰가 정말로 메모리 위에 올라왔을때 viewDidLoad라는
ViewController 생명주기가 호출된다. (메모리에 올라가면 한번만 호출됨)
viewWillAppear - view 가 메모리에 Load 되고 그 다음에 유저눈에 보이게 될건데 유저눈에 보이기 직전이다 라는 생명주기이다.
(여러번 호출될 수 있는 특징을 가짐.)
viewIsAppear - 나타나고 있는 생명주기
viewDidAppear - 뷰가 정말로 나타났다. 유저눈에 뷰가 보이는 생명주기
viewWillDisappear - 뷰가 사라질 것이다
viewDidDisappear - 뷰가 유저 눈에서 완전히 사라졌다
코드베이스로 작성 SceneDelegate세팅
func scene(_ scene: UIScene, willConnectTo session: UISceneSession, options connectionOptions: UIScene.ConnectionOptions) {

        guard let windowScene = (scene as? UIWindowScene) else { return }

        let window = UIWindow(windowScene: windowScene)

        // 페이지간에 이동도 해볼거기 때문에 루트뷰에 바로 뷰컨트롤러 넣지 않고 네비게이션컨트롤러 선언 후 그 안에 넣어준다
        window.rootViewController = UINavigationController(rootViewController: ViewController())
        window.makeKeyAndVisible()
        self.window = window
    }
UINavigationController 는 안에서 ViewController끼리의 이동을 도와줄 수 있는 클래스.
그래서 NavigationController라는 틀 안에 뿌리가 되는 ViewController로 ViewController() 클래스를 지정해줌.
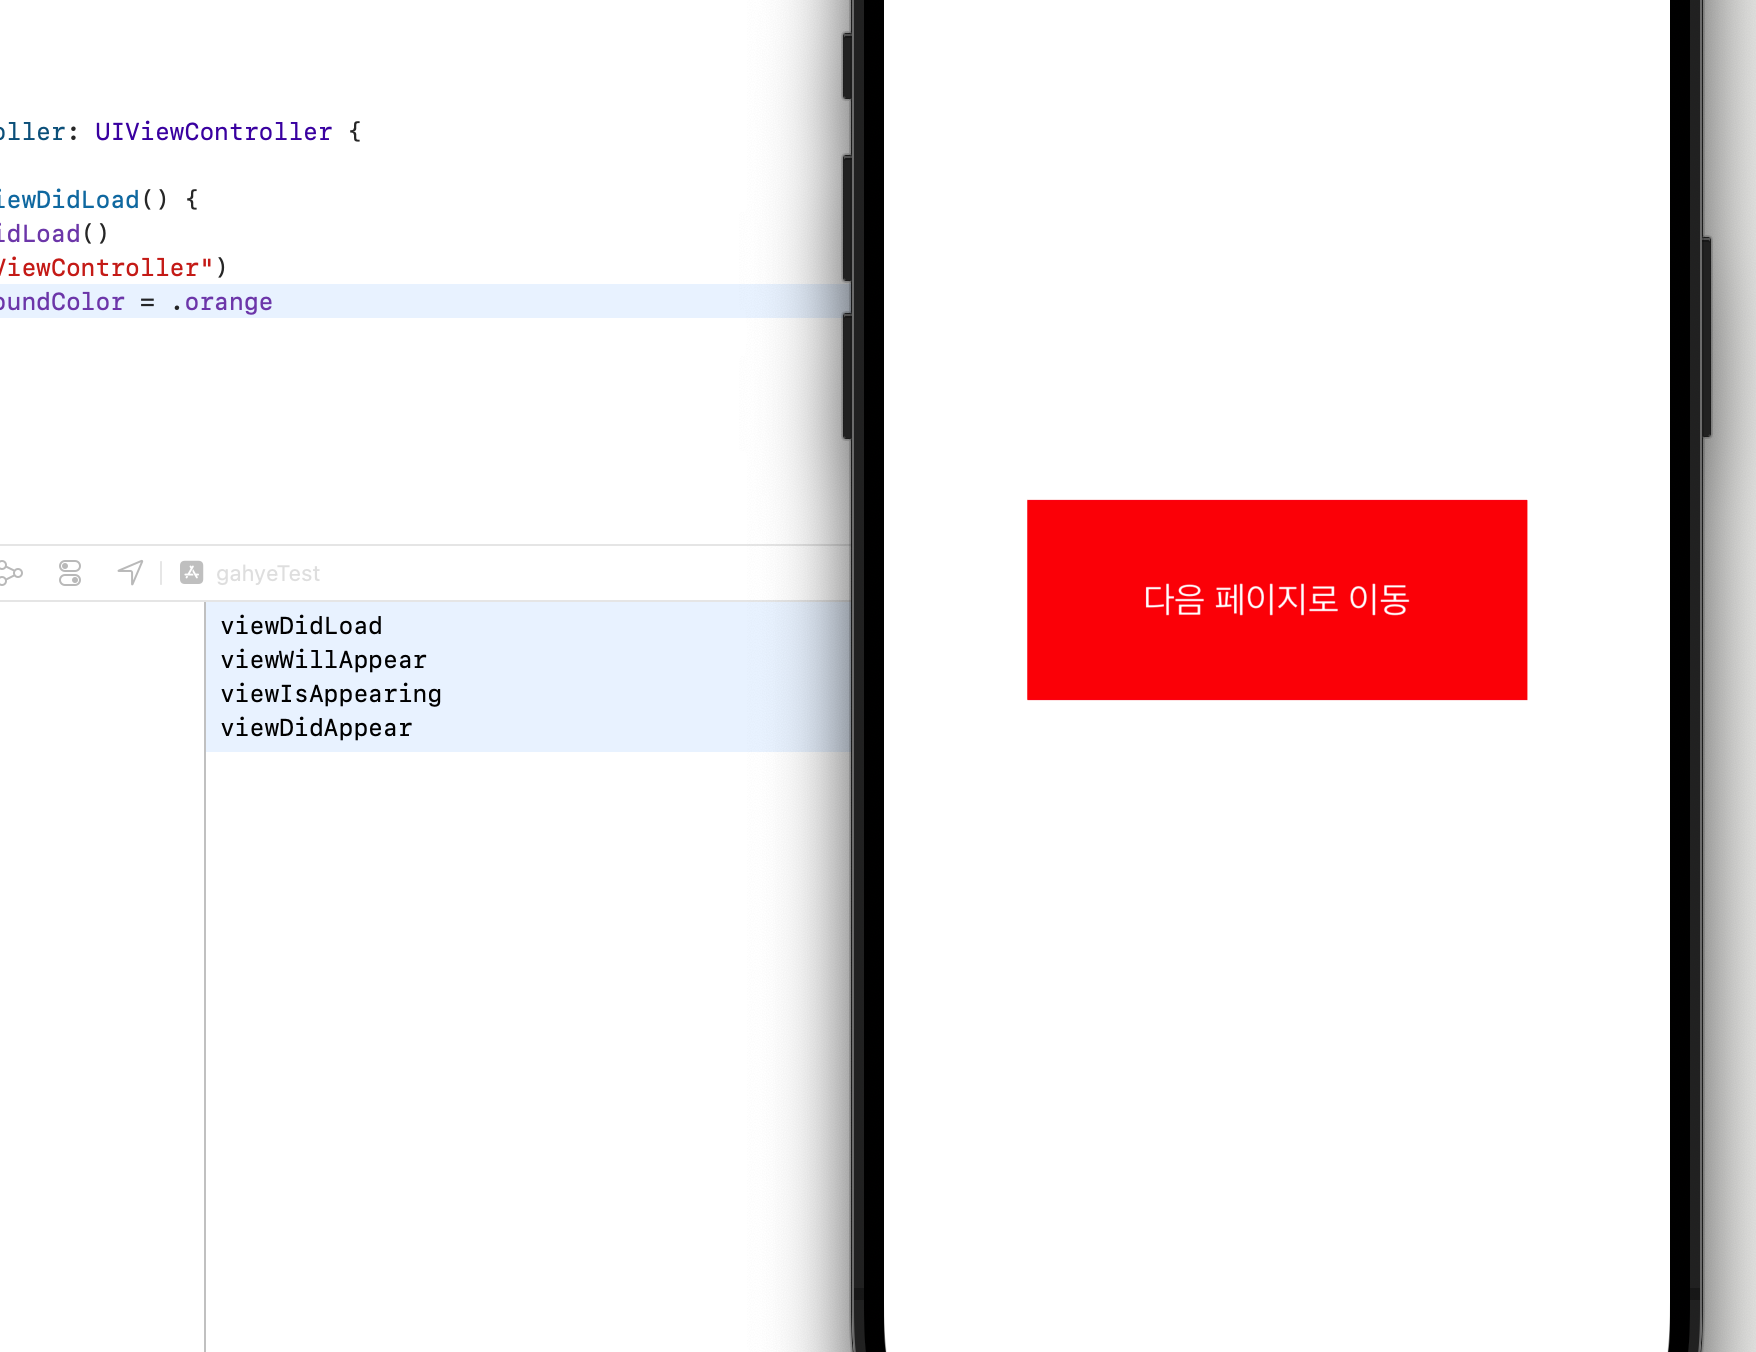
이후 ViewController 에서 viewDidLoad 를 print해주고 실행했을 때 콘솔에 viewDidLoad가 잘 찍히면
SceneDelegate에서 windowScene이랑 window를 생성하는 데 문제없이 잘 생성되었고
UINavigationController 안에 ViewController를 담았는데 그 ViewController가 메모리 위에 잘 올라왔다는 것을 의미한다

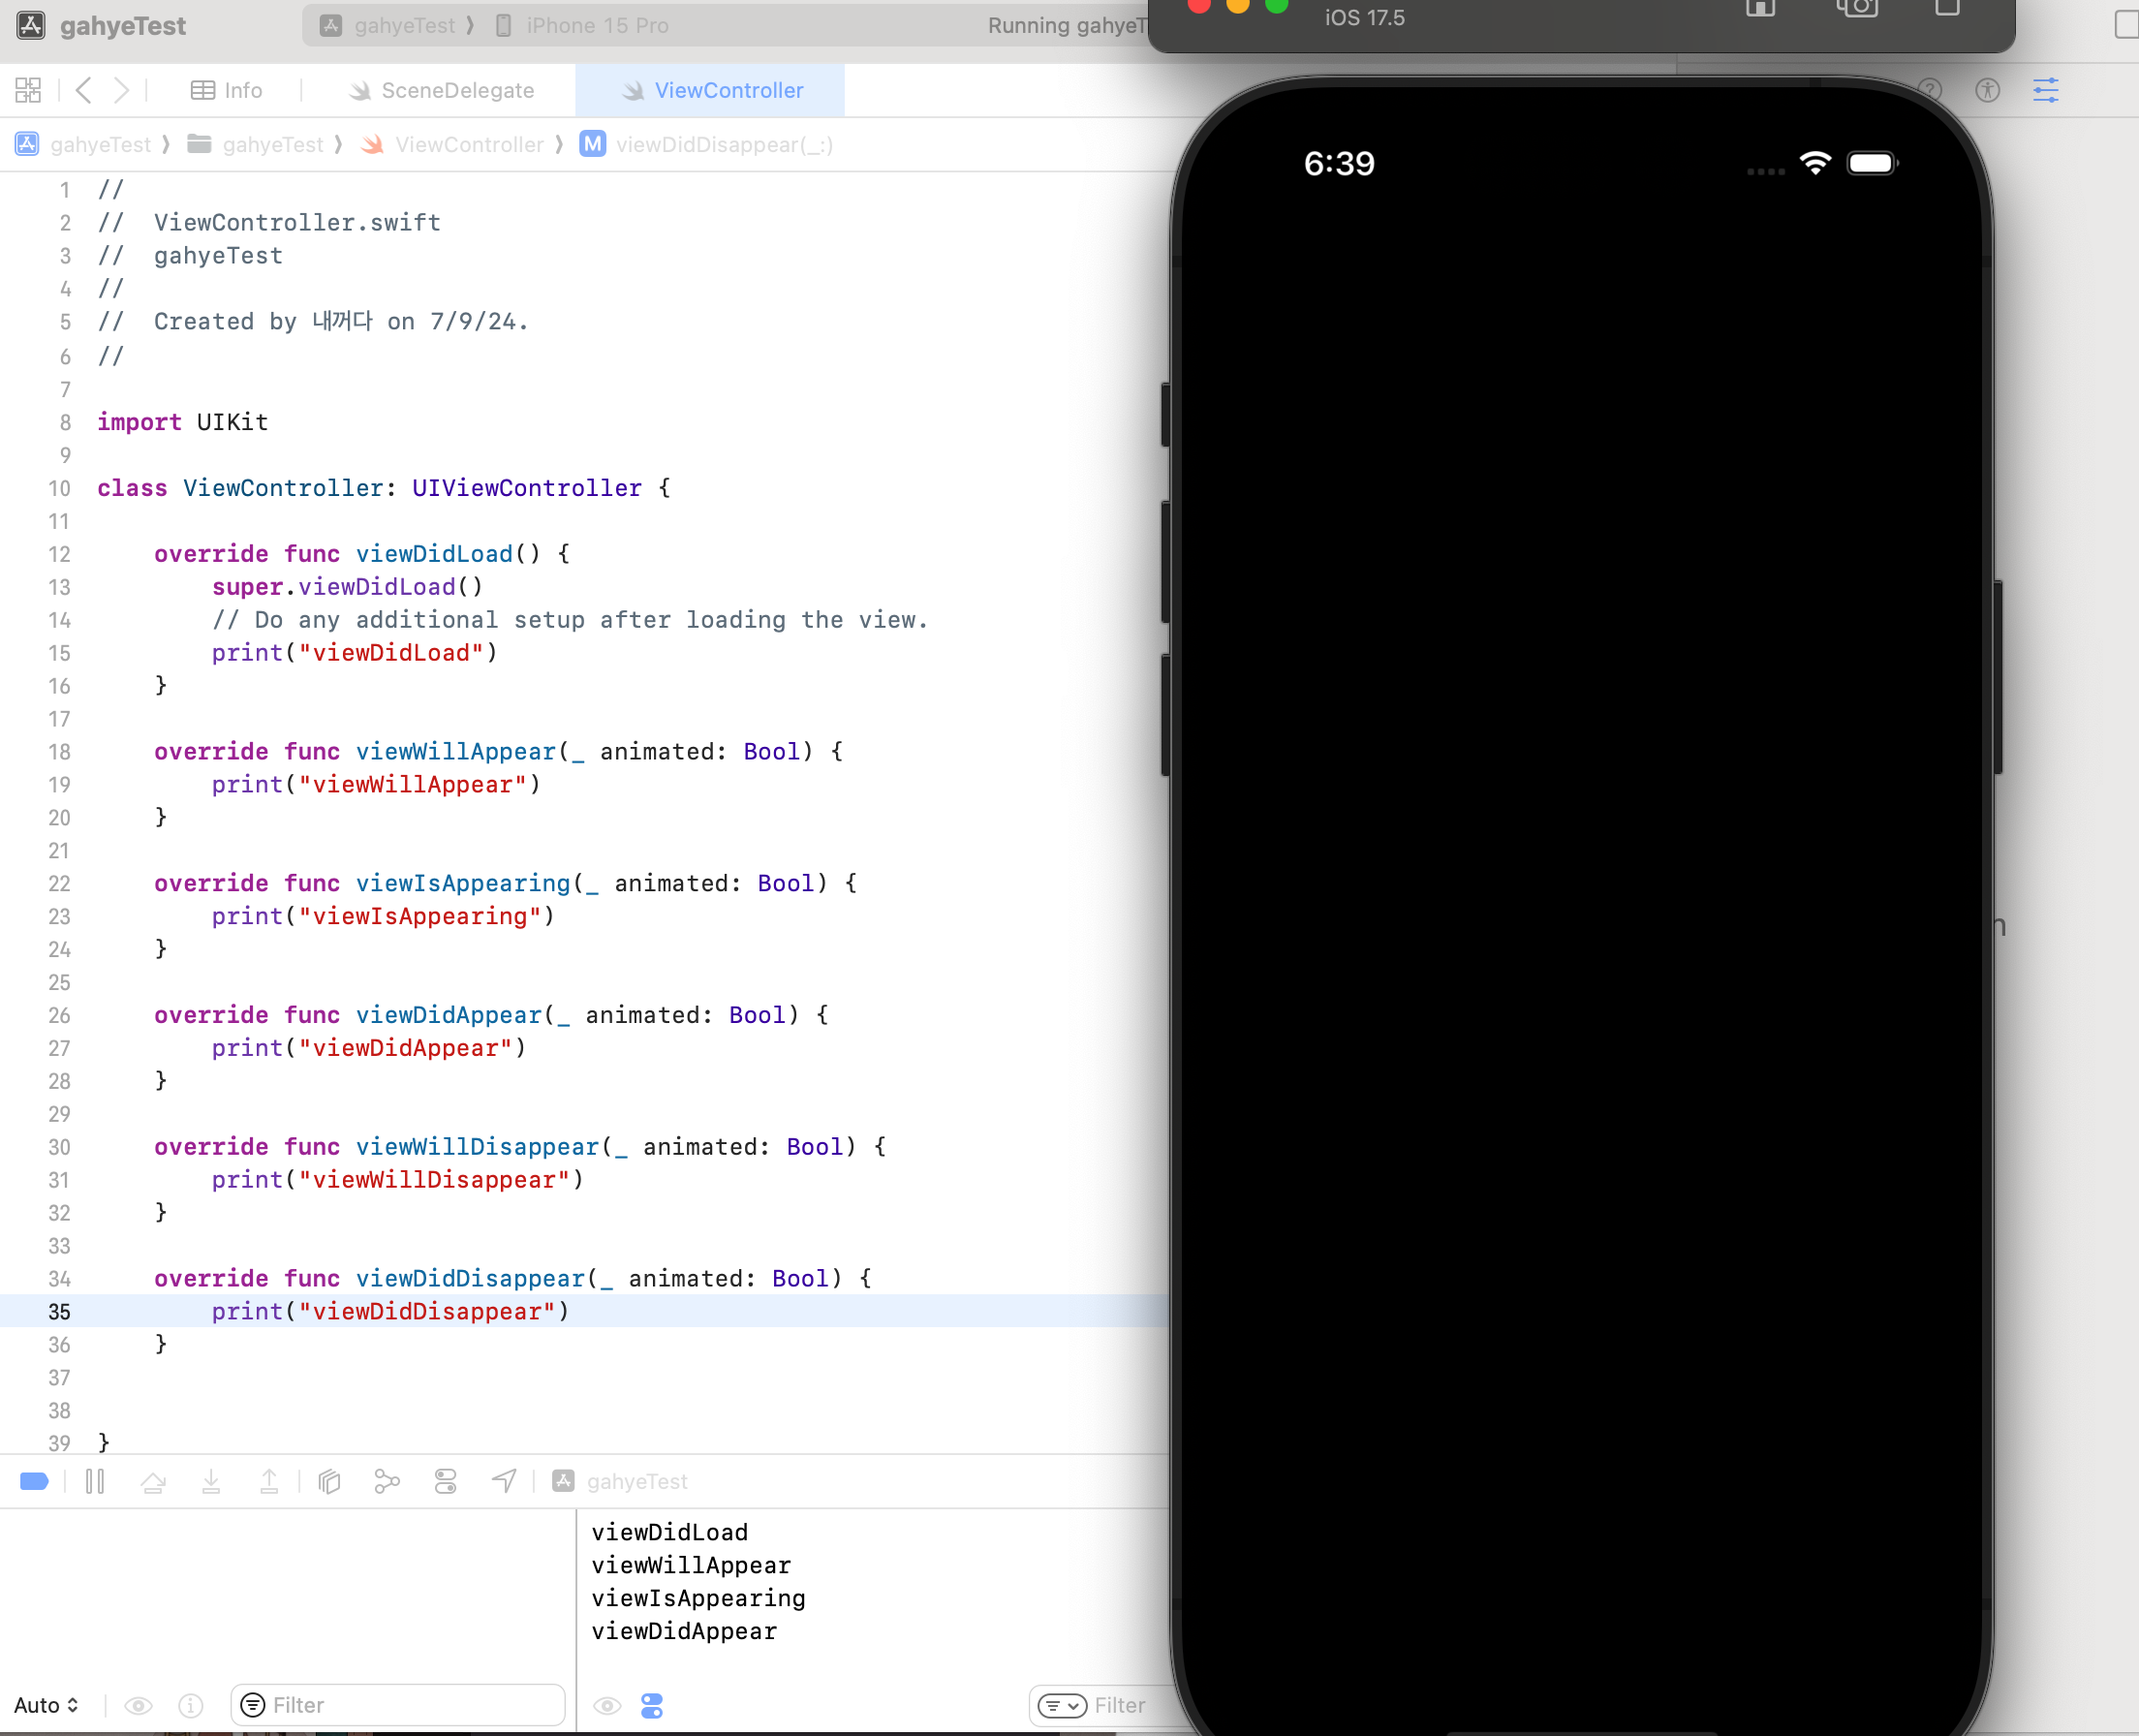
view가 아직 사라지지 않았으니 Disappear 의 Lifecycle 메서드는 불리지 않았음.
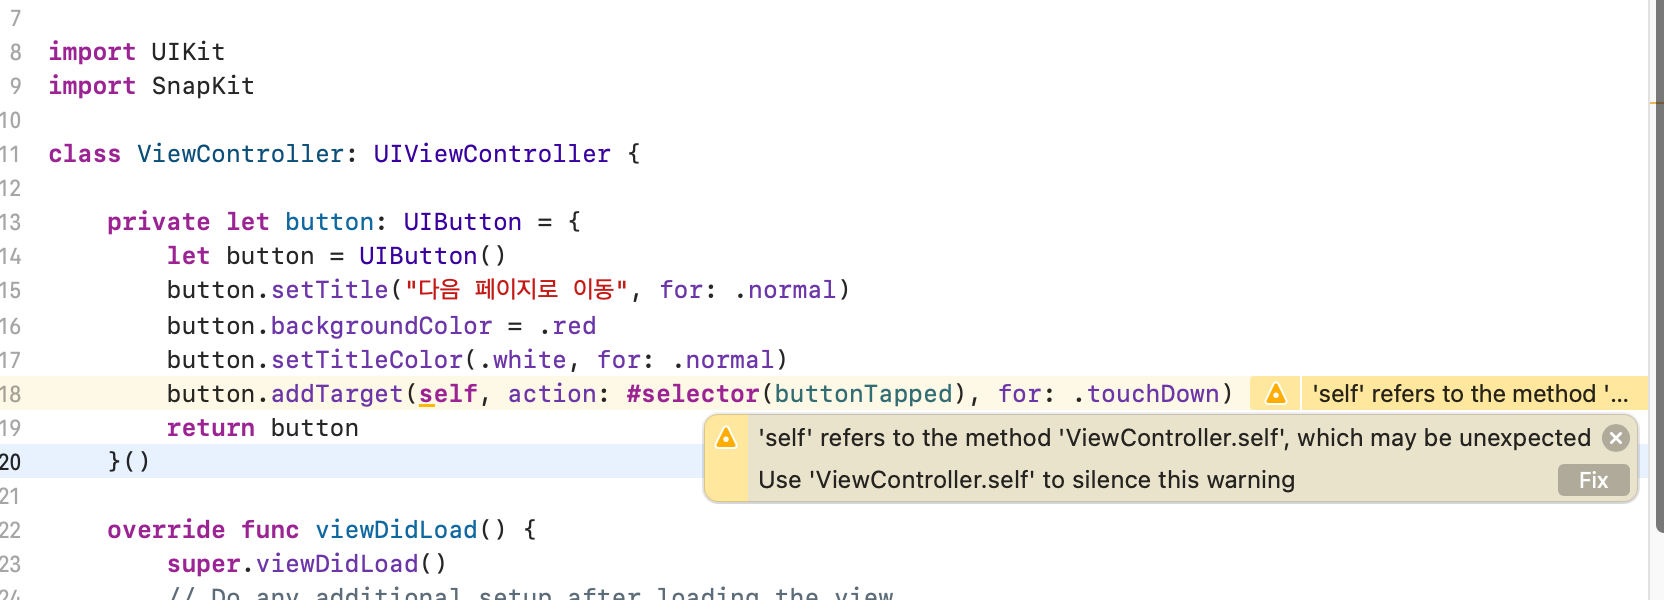
버튼을 초기화하는 코드인데 이 시점에 아직 초기화되지 않았기 때문에 에러가 뜸
let 을 사용하면 바로 이 시점에 이 코드들을 수행하면서 button에 대한 초기화 코드들이 바로 실행되는데 lazy를 사용해주면 초기화 시점을 늦추게 해준다.
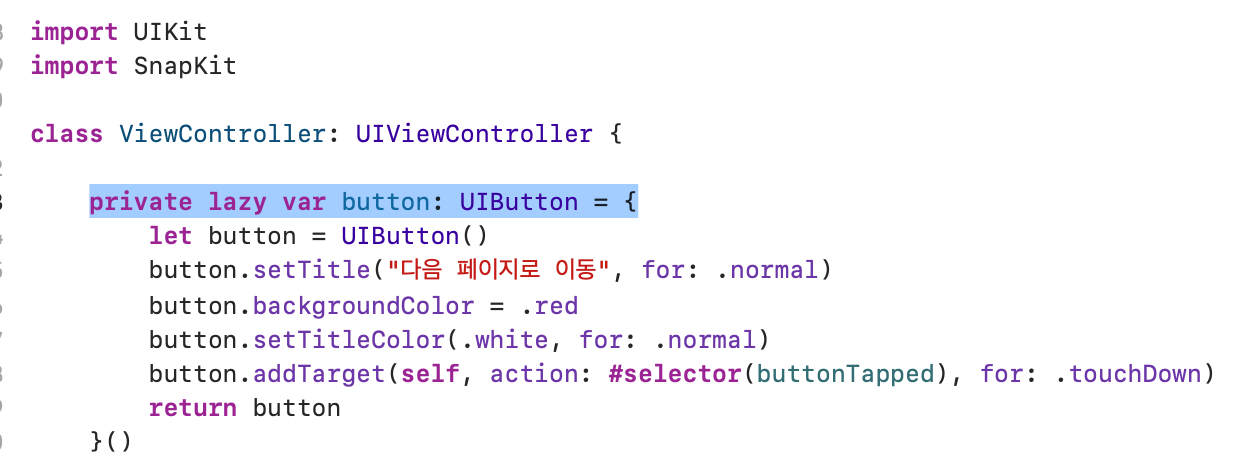
lazy var 로 수정하면 코드 에러가 사라짐
lazy 는 코드가 불리는 순간에 초기화를 미루는 코드. viewController가 초기화가 끝났을 테니까 에러가 뜨지 않음
swift 파일을 하나 더 만들어서 다음 뷰로 넘어가게 만들어주기
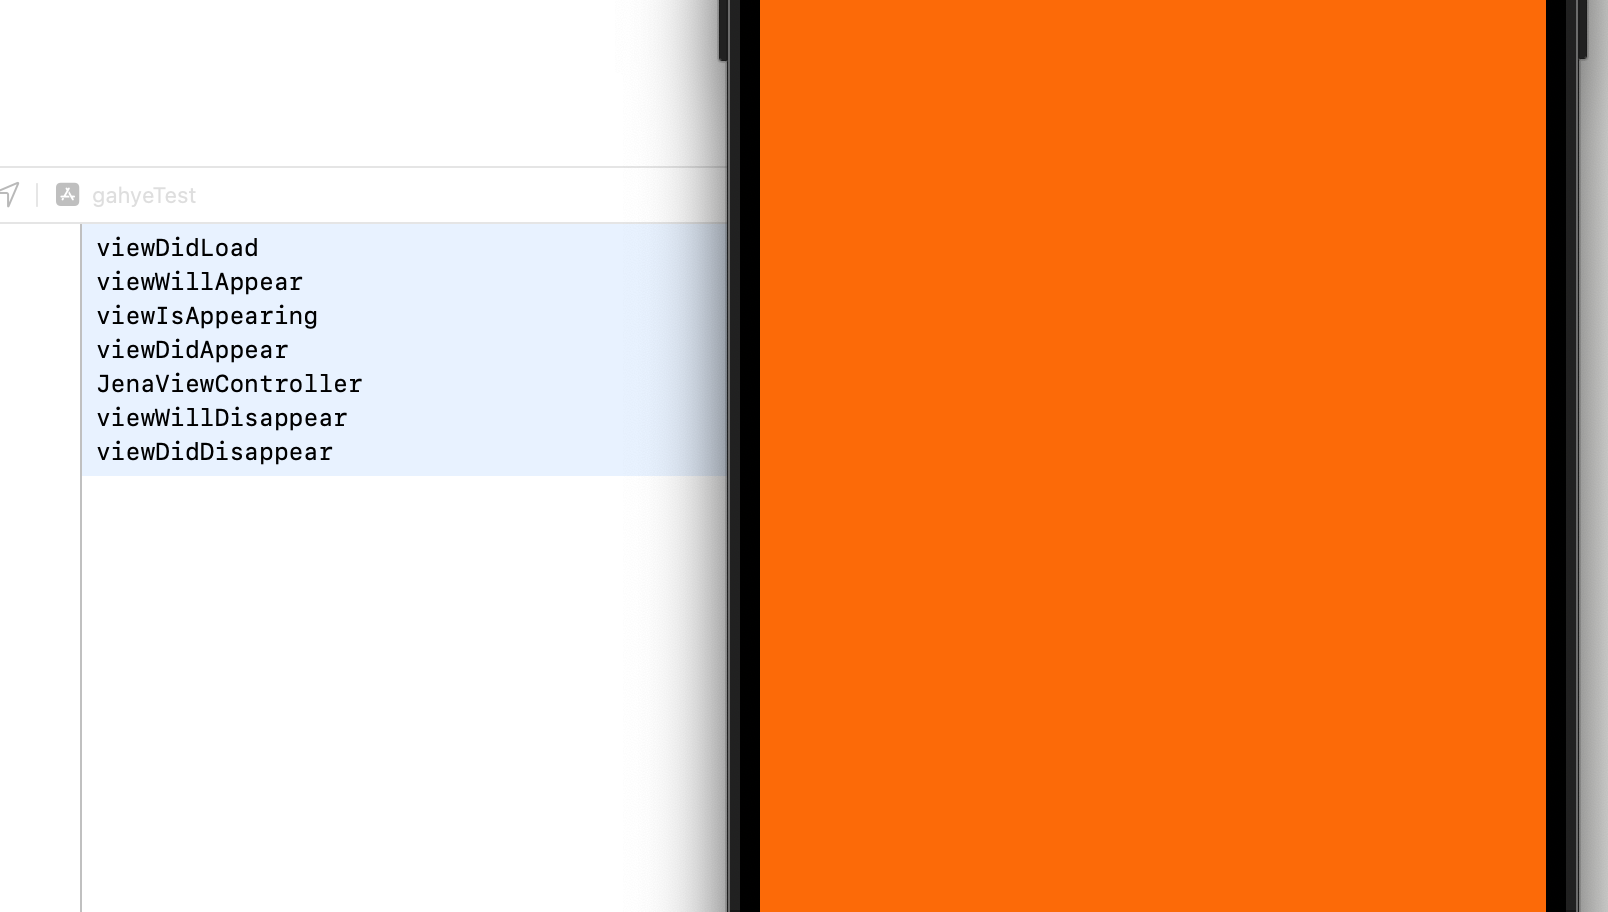
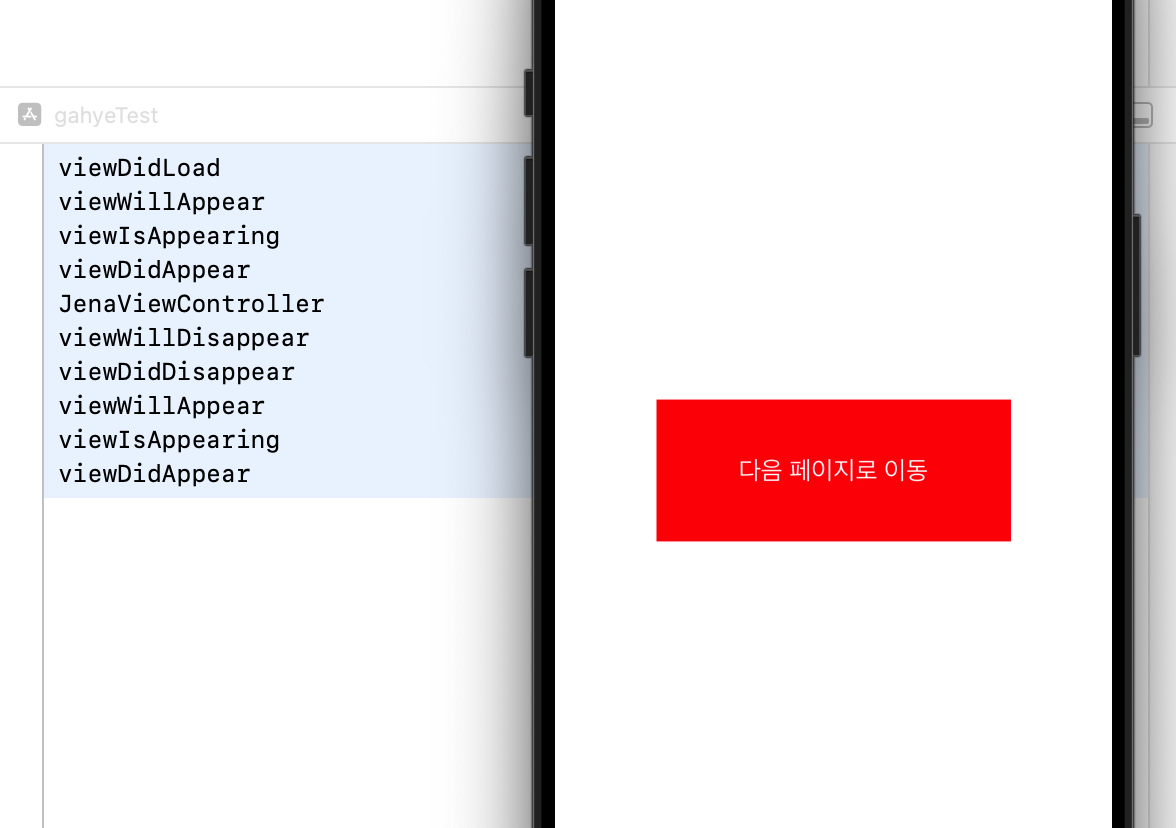
다음 뷰로 넘어갈때 Disappear이 실행되는걸 볼 수 있다.
//
//  SceneDelegate.swift
//  gahyeTest
//
//  Created by 내꺼다 on 7/9/24.
//

import UIKit

class SceneDelegate: UIResponder, UIWindowSceneDelegate {

    var window: UIWindow?


    func scene(_ scene: UIScene, willConnectTo session: UISceneSession, options connectionOptions: UIScene.ConnectionOptions) {

        guard let windowScene = (scene as? UIWindowScene) else { return }

        let window = UIWindow(windowScene: windowScene)
        window.rootViewController = UINavigationController(rootViewController: ViewController())
        window.makeKeyAndVisible()
        self.window = window
    }

    func sceneDidDisconnect(_ scene: UIScene) {
        // Called as the scene is being released by the system.
        // This occurs shortly after the scene enters the background, or when its session is discarded.
        // Release any resources associated with this scene that can be re-created the next time the scene connects.
        // The scene may re-connect later, as its session was not necessarily discarded (see `application:didDiscardSceneSessions` instead).
    }

    func sceneDidBecomeActive(_ scene: UIScene) {
        // Called when the scene has moved from an inactive state to an active state.
        // Use this method to restart any tasks that were paused (or not yet started) when the scene was inactive.
    }

    func sceneWillResignActive(_ scene: UIScene) {
        // Called when the scene will move from an active state to an inactive state.
        // This may occur due to temporary interruptions (ex. an incoming phone call).
    }

    func sceneWillEnterForeground(_ scene: UIScene) {
        // Called as the scene transitions from the background to the foreground.
        // Use this method to undo the changes made on entering the background.
    }

    func sceneDidEnterBackground(_ scene: UIScene) {
        // Called as the scene transitions from the foreground to the background.
        // Use this method to save data, release shared resources, and store enough scene-specific state information
        // to restore the scene back to its current state.
    }


}
//
// JenaViewController.swift
// gahyeTest
//
// Created by 내꺼다 on 7/10/24.
//
import UIKit
class JenaViewController: UIViewController {
override func viewDidLoad() {
super.viewDidLoad()
print("JenaViewController")
view.backgroundColor = .orange
}
}
랜덤한 색 나오게 해주기 viewDidLoad에 작성해주면 상황이 연출되지 않음. viewWillAppear에 작성해 주어야함
override func viewWillAppear(_ animated: Bool) {
    print("viewWillAppear")

    self.view.backgroundColor = UIColor(
        red: .random(in: 0...1),
        green: .random(in: 0...1),
        blue: .random(in: 0...1),
        alpha: 1.0
    )

    self.button.backgroundColor = UIColor(
        red: .random(in: 0...1),
        green: .random(in: 0...1),
        blue: .random(in: 0...1),
        alpha: 1.0
    )
}
'iOS (스파르타) > 앱 개발 숙련' 카테고리의 다른 글
| SceneDelegate.swift (0) | 2024.07.12 |
|---|---|
| 날씨 앱 만들기 (1) | 2024.07.11 |
| 네트워크 통신 이해 (0) | 2024.07.11 |
| CoreData 와 UserDefaults - 일단 강의만 빠르게 수강 수정예정 (0) | 2024.07.10 |
| 메모리 관리 이해 (1) | 2024.07.10 |


